Dana's Rein Tutorial
For Photoshop CS6
Hello and
welcome to my little rein tutorial. A lot of people asked me how I do them, so
I thought a tutorial is in order. Here I will show you how I draw my reins. I show this with a western bridle which
usually has open split reins but all this applies to shorter, closed reins as
well.
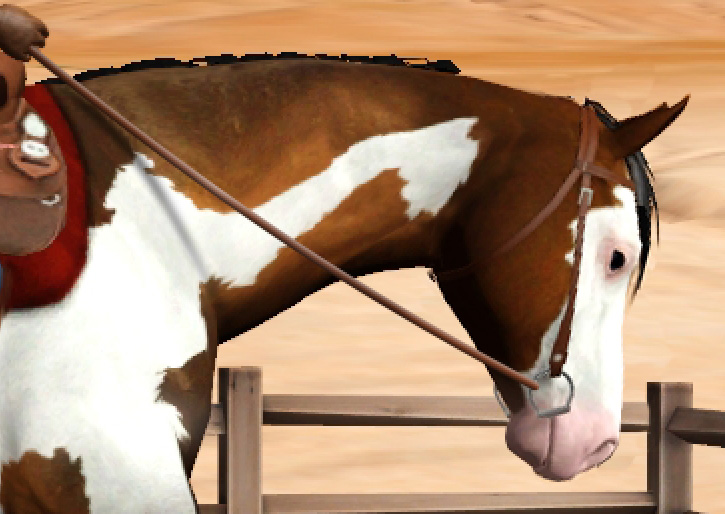
What you will create:

|
Step 1 – The pen tool
The pen tool is your friend! I’m using Photoshop CS6 where it’s become incredibly easier to work with the pen tool, but everything here you can also achieve with earlier Photoshop versions. Grab the pen tool (keyboard shortcut P) and zoom in on the area where the reins will be. Before you click anything in the picture, adjust the pen settings as following: |
|
|
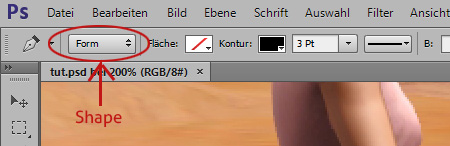
Set the
drop down menu to shape, the fill to
none, the stroke color to a black and the size to 3 for now.
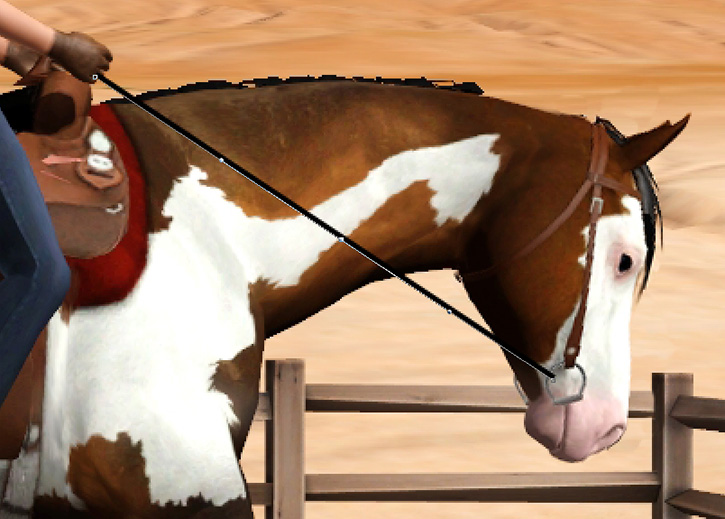
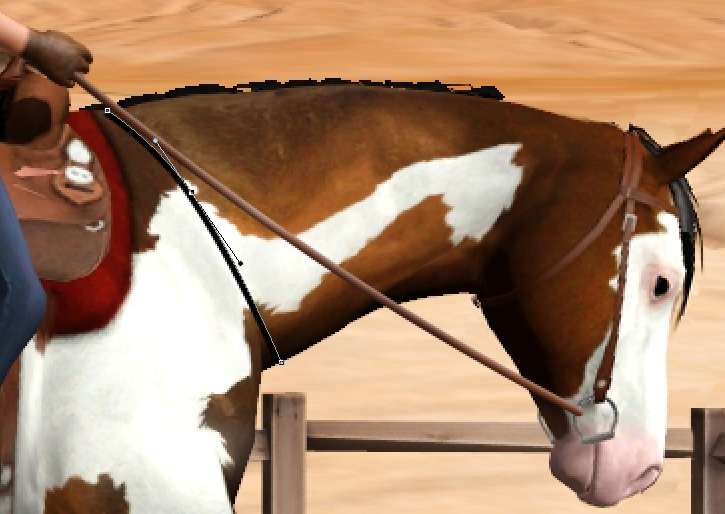
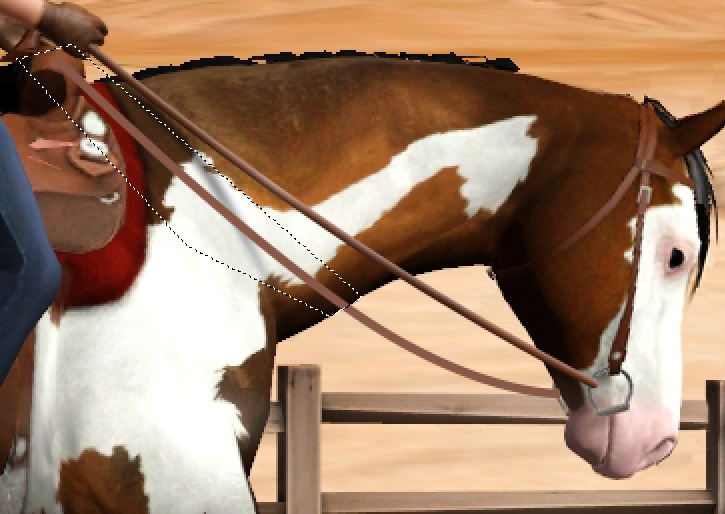
Next, click on the part of the bit where the rein attaches to it and then click to the part of the rider’s hand where the reins are held. You will get a straight black line connecting the horse’s mouth to the rider’s hand. But this is way too straight, so we need to add a little sag to the rein. With the pen tool still selected, click somewhere in the middle of the rein again and it will look like this: |
|
|
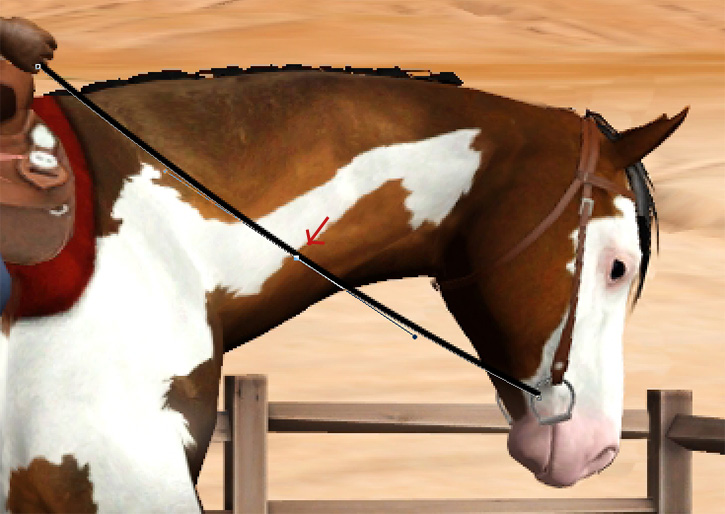
We now
added a new point to the path we created with the pen tool. Select the Direct Selection Tool, that’s the white
little arrow (keyboard shortcut A),
and click and drag the middle point we just added to the rein down a bit.
|
|
|
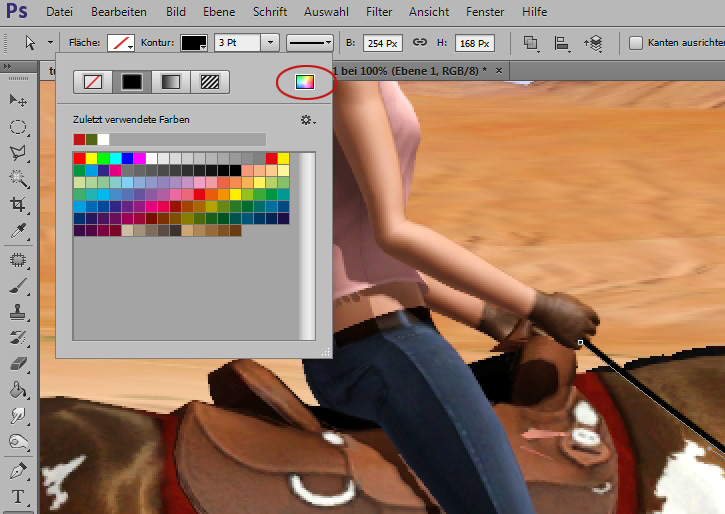
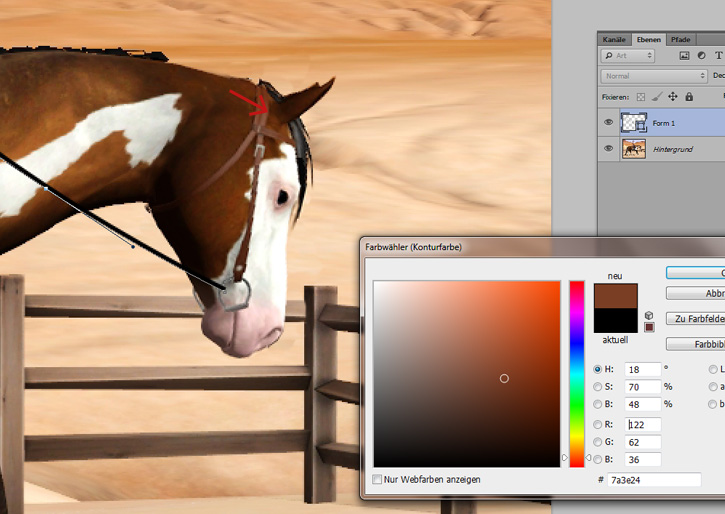
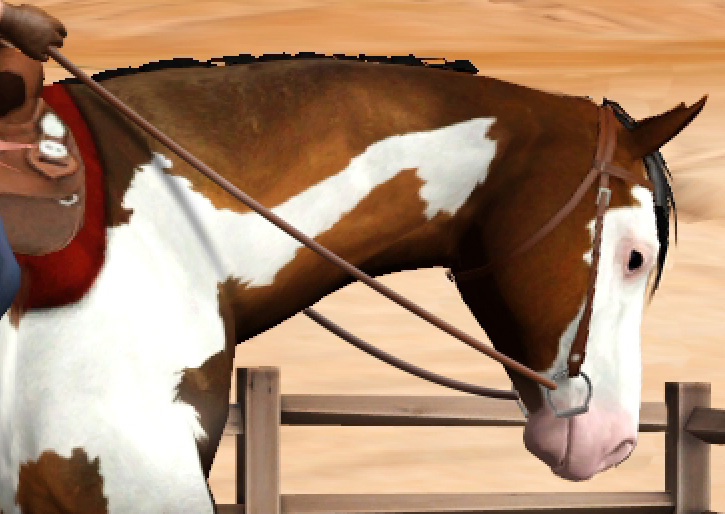
In this
case we’re done with this rein. So now we’ll choose a decent color for it,
because it should match the bridle. Click on the Stroke panel further up and then on the rainbow colored little box
to open up the color picker.
|
|
|
Choose a
medium light color for the base color of the reins. I chose this spot, it’s not
the brightest and not the darkest of the bridle.
|
|
|
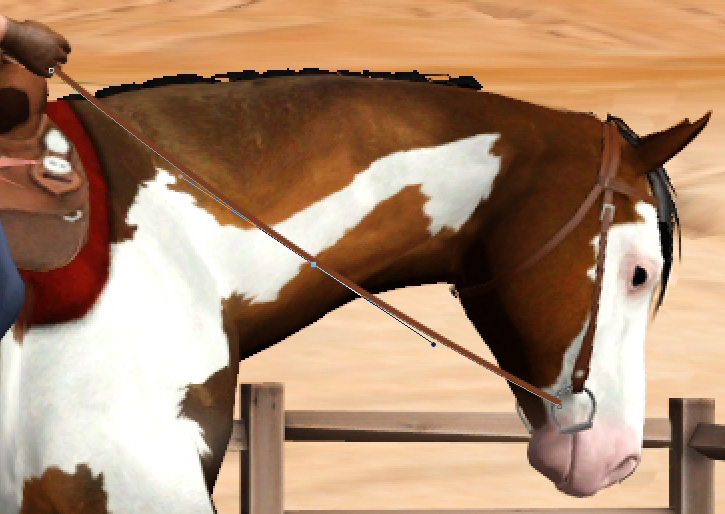
Hit OK and
check if the rein color is alright. If not, readjust it. I’m happy with this color.
|
|
|
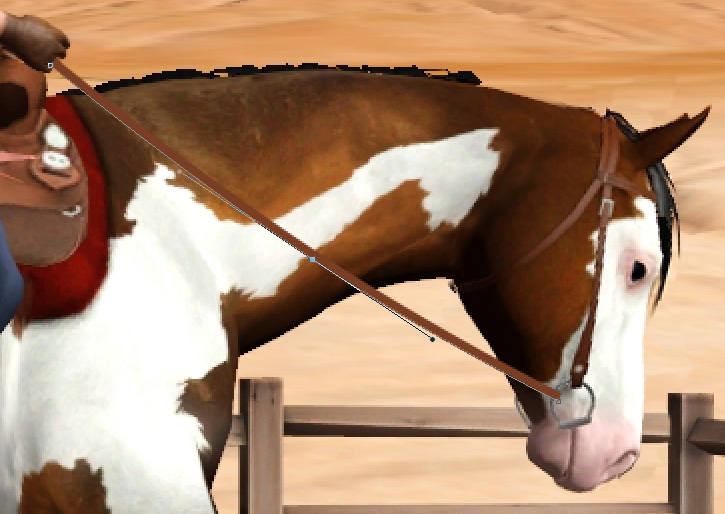
Now we need
to adjust the rein thickness. In the options further up enter a number a bit
higher or lower to get your desired rein thickness. I chose a number of 4.38
pt.
|
|
|
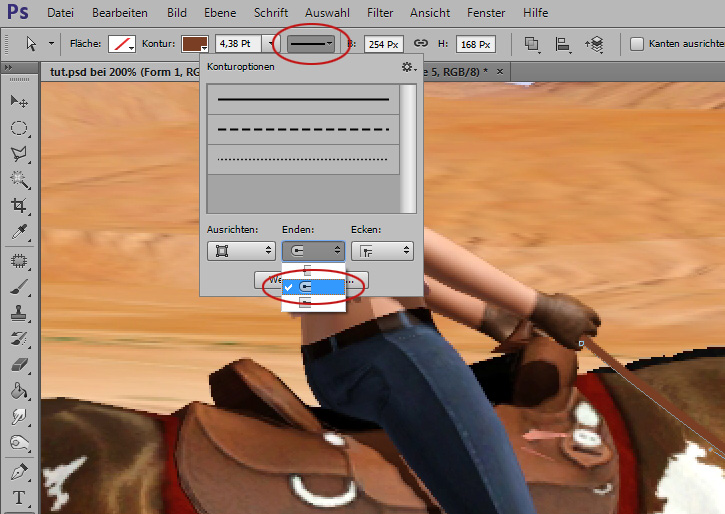
I also like
to have the reins not cut off so abruptly, so I change the contour like this:
|
|
|
This can
cause your rein to get a bit longer so you might need to adjust the positioning
of the ends.
When I’m happy with the rein, I flatten the layer by right clicking in the layer manager and selecting Rasterize layer. You now have a normal pixel layer and the path is gone. |

|
|
Step 2 – Adding light and shadow to the rein
Now double click the layer we just rasterized, to open the layer styles. Select bevel and emboss and adjust the light source. The light is coming from here, so I change the light source accordingly: |
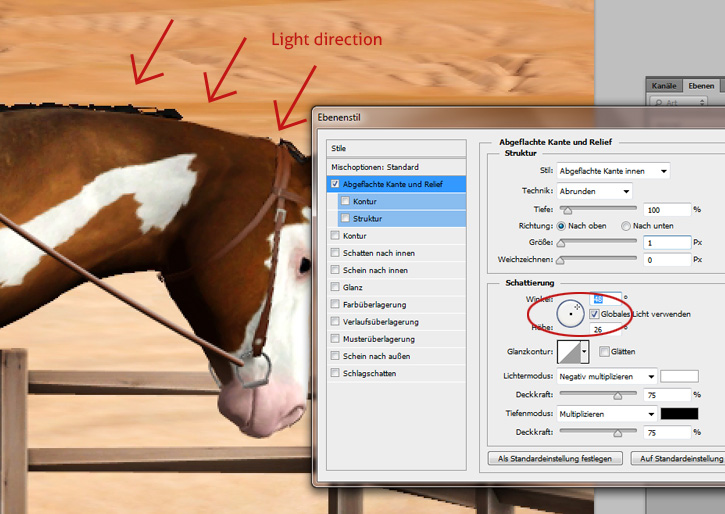
|
|
Now choose
a size of 1 and set the depth to 1 as well. Click OK.
Next, in the layer manager click on the Lock Transparent Pixels icon. When we draw on the rein now, we won’t color anything but the rein. |

|
|
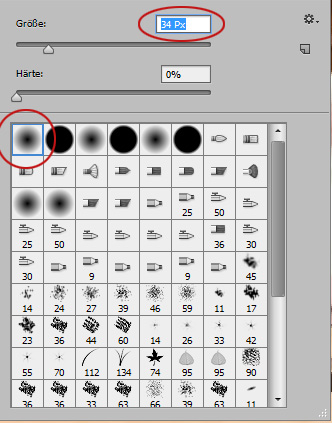
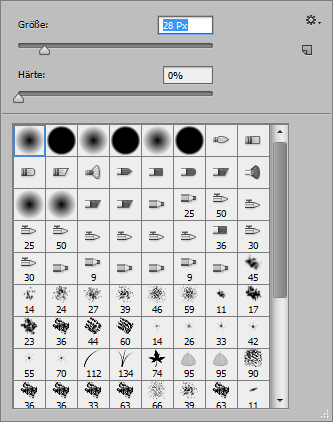
Select the
brush tool and choose settings similar to these:
|
|
|
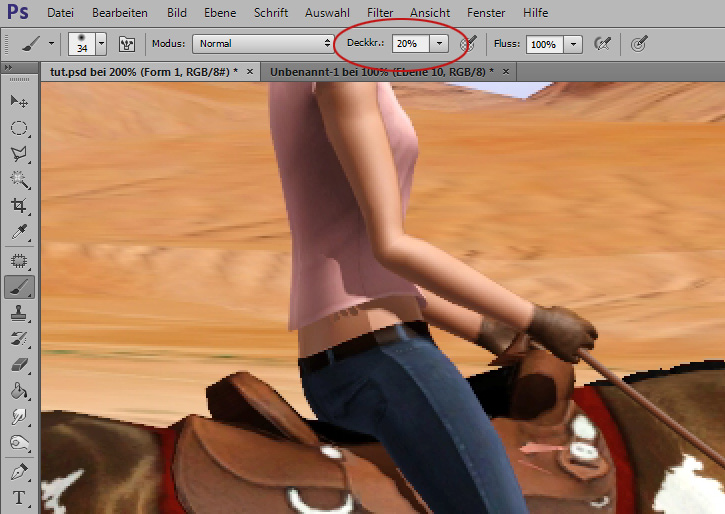
Also, lower
the opacity to about 20%:
|
|
|
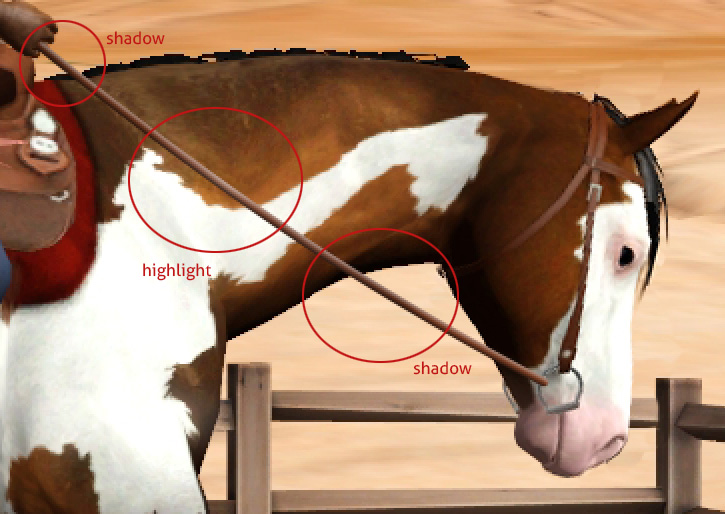
Select the
darkest color from the bridle and start painting a bit on the rein where the
shadows would be. In this case there isn’t much but I added some shadow to the
end which is held by the rider and a bit in between. Repeat this with the
lightest color of the bridle to add highlights.
|
|
|
Step 3 – Adding a drop shadow
No, we won’t simply add a layer effect drop shadow on the rein, we make our own to make it a lot more realistic. Create a new layer and drag it underneath your rein layer. |

|
|
The new
order is from bottom to top: background layer, new layer and rein layer.
Select the pen tool again and create a line on the horse’s neck close to the rein. Remember where your light source is and how the shadow of the rein would fall on the horse’s neck. Add a new point to the path by clicking on it in its middle. Select the Direct Selection Tool again and click and drag the middle point a bit upwards towards the rein. |
|
|
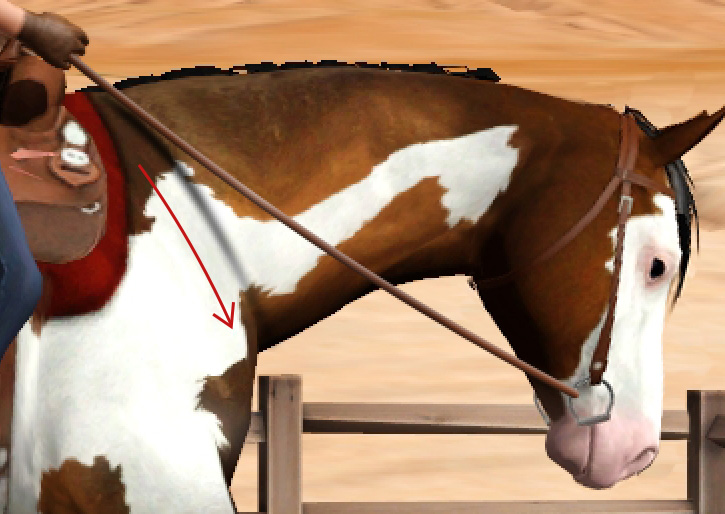
The rein is
closest to the neck where the neck is thickest, so about in the middle of the
neck. So the shadow is closest to the rein here. We don’t have a straight line
of a shadow because the neck is round.
Select a black stroke and about the same size as your rein (mine was 4.38 pt). Now click on Filter -> Blur -> Gaussian Blur, confirm the rasterize question with OK and choose a radius of about 1.8 pt and confirm again. Select the Eraser tool (keyboard shortcut E) and choose the following brush settings: |
|
|
As well as
an opacity of about 20%. If a shadow is further away from its source it gets
lighter, so we will delete the parts of the shadow which are further away from
the rein to make it fade.
|
|
|
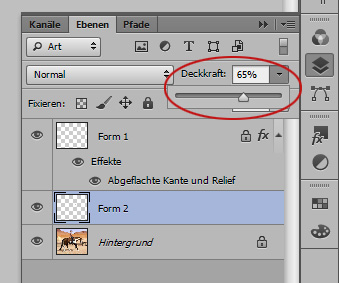
The shadow
is still too dark, so we will lower the layer’s opacity. I lowered it to 65%
but it varies from coat color to coat color.
|
|
|
It looks
like this now:
Nice, subtle drop shadow. |
|
|
Step 4 – The other reins/parts
For the other rein I drew a new path again and used the same color and size as before, then I rasterized the layer and cut off the parts which were hidden by the horse or rider: |
|
|
Just select
the Polygonal Lasso Tool (Keyboard
shortcut L) and select the parts you
wish to delete and hit delete or backspace.
Then add the layer effects bevel and emboss again, lock the transparent pixels and paint on the rein to add more shadow. |
|
|
Do the same
with the rein ends and you’re done!
|
|
|
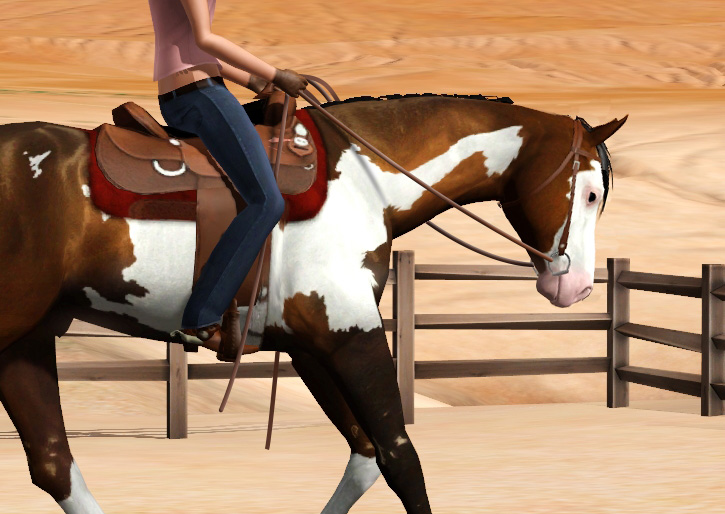
Now, a little info on rein physics and their
effect on the picture:
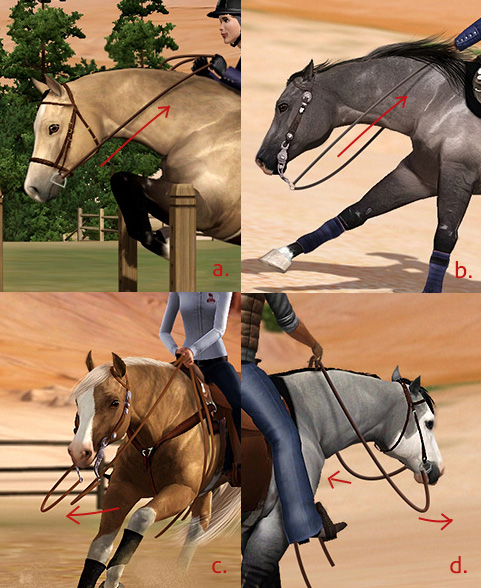
a. Here is an example of a hunter jumping an obstacle. Because the rider is holding the reins pretty tightly, they don’t hang down but rather make an upwards curve, this kind of upwards line gives a feeling of momentum and speed. b. In this picture, the rein also has a slight upwards curve and is a result of the horse’s speed and the short hold of the rider. c. When the horse is making a sharp turn, the (long and loose) reins tend to sway in the opposite direction. This is a great way of showing how fast and sharp your horse can turn. d. This horse is going at a medium lope and is just going in to the suspension phase, so the (long and loose) reins can go in different directions. |
|
